Archive
Sample
Xen Virtualization on Linux and Solaris
RH’s opensource distros ISO images (Fedora,CentOS) have a nice feature,been loop mounted on apache folder /var/www/domain, they allow to create local mirror to virt-install corresponding paravirtual guest. Not customized Ubuntu ISOs don’t have this feature, however virt-install still works for Oneiric, Natty, Lucid utilizing remote system HTTP source. Virt-install Oneiric PV DomU is possible via remote official HTTP source :-
http://ca.archive.ubuntu.com/ubuntu/dists/oneiric/main/installer-amd64/.
Start install by command :-
virt-install --connect xen:/// -n OneiricPV \

 --nographics \

 -p -r 2048 --vcpus=2  -f /dev/sdb6  \

-l http://ca.archive.ubuntu.com/ubuntu/dists/oneiric/main/installer-amd64/
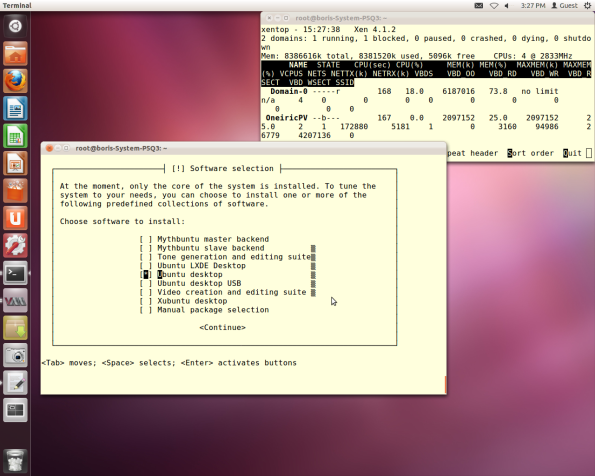
proceed with text mode install


Diring tasksel run I’ve selected “Basic Ubuntu Server”,”SSH”,”Ubuntu Desktop”
all done domain reboots
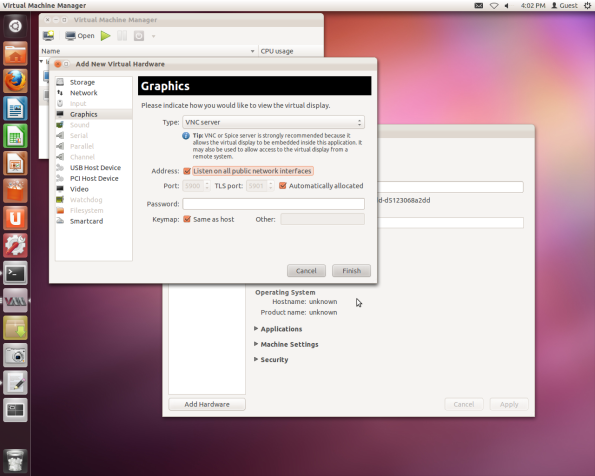
Open Virt-Manager and add VNC Server to graphics section
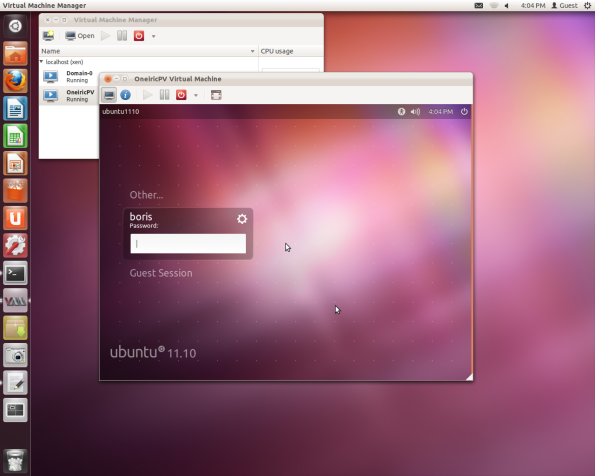
Start updated DomU via Virt-Manager:-

This post describes how to automate System Monitoring with OTRS and Nagios.
OTRS is an Open source Ticket Request used to manage customer telephone calls and e-mails. The systemsupports network service, sales, pre-sales, internal IT, helpdesk etc. department to react quickly to inquiries.Nagios is a system and network monitoring system that can be used to monitor many network services likeSMTP, HTTP etc… on remote hosts. It alerts the recipient groups when any system goes down or malfunctions.
Requirements
- Running Instance of OTRS.
View original post 629 more words
Applications failing with /etc/mtab errror
Check on
cat /proc/mounts and ensure all mounts listed in /etc/fstab are mounted
For those NOT mounted mount with mount command
If possible a reboot at times solve the problem.
Linux based file systems become read-only
VMware has identified a problem where file systems may become read-only after encountering busy I/O retry or SAN or iSCSI path
failover errors.
The same behavior is expected even on a native Linux environment, where the time required for the file system to become read-only
depends on the number of paths available to a particular target, the multi-path software installed on the operating system, and
whether the failing I/O was to an EXT3 Journal. However, the problem is aggravated in an ESX host environment because ESX host
manages multiple paths to the storage target and provides a single path to the guest operating system, which effectively reduces the
number of retries done by the guest operating system.
These guest operating systems are affected:
•RHEL5 (RedHat)
•RHEL4 U6
•RHEL4 U4
•RHEL4 U3
•SLES10
•SLES9 SP3
•Ubuntu 7.04
Note: This issue may affect other Linux distributions based on early 2.6 kernels as well, such as Ubuntu 7.04.
Solution
Note: This article does not supersede the Guest Operating System Installation Guide. A guest operating system upgrade may require an
ESX upgrade as well.
This Linux kernel bug has been fixed in different updates of different Linux distributions. Not all kernel versions include the
patch. Contact your Linux Distributor for more information.
•For RHEL5, upgrade to Update 1 (also referred to as RHEL5.1). For more information, see the RedHat Bug 228108.
•For RHEL4 U6, upgrade to kernel version 2.6.9-89.0.7. For more information, see the RedHat Bug 197158.
•For RHEL4 U3 and RHEL U4, upgrade to Update 5 (RHEL 4.5).
•For SLES10, upgrade to SP2. For more information, see the Novell Knowledge Base article 3605538.
•For SLES9 SP3, upgrade to SP4 or SP3 Maintenance Release build 2.6.5-7.286. For more information, see the Novell Knowledge Base
article 7005154.
•For Ubuntu 7.04, upgrade to 7.10.
Additional Information
As a workaround, remount the Linux file system using this command to return it to the proper state:
mount -o remount /
Note: It is ideal to identify the problem and resolve the issue rather than performing this workaround when this situation arises.
For translated versions of this article, see
See link:
http://kb.vmware.com/selfservice/microsites/search.do?language=en_US&cmd=displayKC&externalId=51306
Wireless USB adapter doesn’t work on Ubuntu.
What you will need
– Your Ubuntu installation CD
– Your windows drivers/hardware drivers cd or download from internet
The solution
You will need to get a few programs running to get your adater working. One is a program which I think controls and ‘helps’ wireless networking run and the second is a graphical user interface which converses with the first program without the user having to use the command line. Follow these steps
Go to: System > Administration > Synaptic Package Manager
Search there for: ndiswrapper-utils, ndiswrapper-common and ndisgtk
If nothing is found then Insert your Ubuntu CD
You will now need to add the CD to your ‘Souces’. In administration ‘Manage Sources’ and add your cd/dvd
Now in Synaptic Package Manager click on “Source” (This means the Ubuntu Source CD I think!?)
Again search for ndiswrapper-utils, ndiswrapper-common and ndisgtk
You should now be able to tick these items and save the Package Manager, which will then install the three programs
Go to System > Administration > Windows Wireless devices (This is the new program you’ve just installed ndiskgt thanks to Sam Pohlenz)
Now Click on Insert New Driver
Insert your cd which came with your wireless device
Browse to the cd and look for the .inf files.
Select the .inf file
Note: Normally these will be in a config forlder or an inf folder and will probably be oranised by Windows Operating System. I chose Windows 7 driver as this was most recent but with one adapter this didn’t work. I think it will probably be a case of ‘if at first you don’t succeed’
Install
Voila, you should see an icon appear next to your volume control which is your Network Manager. This will allow you to select a Network, and tweak your wireless settings.
If you are at this stage and still Ubuntu des not see your wireless USB it is time to either try another driver, or look for alternative solutions.
I could now see the wireless Networks but still could not connect?
source;
Hello world!
Welcome to WordPress.com. This is your first post. Edit or delete it and start blogging!